Wednesday, August 25, 2010

Nine Girls Ask Donation

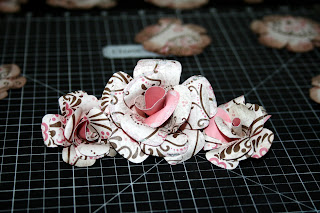
Hello Everyone!  I wanted to share with you all this little donation for a wonderful organization which focuses on research for ovarian cancer.  This is my donation basket for the silent auction, there is $250 in Close To My Heart product, including a 12" x 12" photo album.  One lucky scrapper will take this home and create some lovely pages and help in the research for ovarian cancer.
Nine Girls Ask - 2nd Annual Luncheon Ticket
Nine Girls Ask

Help turn hope into reality.
Join Nine Girls Ask? for a Cure for Ovarian Cancer at the 2nd annual luncheon and silent auction benefiting ovarian cancer research. 
Saturday, September 25, 2010
11:00 a.m.
San Diego Marriott
La Jolla, CA
Tickets $85.00 each
For seating arrangements, in the Comments box at check-out, please let us know:
Name of guest at the table
Mailing address
Phone number
Email address


Includes: educational booths, guest speakers, surprise entertainment, silent auction and more!

Joan Wyllie is the Founder, CEO and Director of 9 Girls Ask.  I was lucky enough to meet Joan through her daughter Myssie last year.  Please visit her website Nine Girls Ask and read Joan's  story and purchase your ticket for the luncheon.
Click Here to be directed to Nine Girls Ask website
Posted by Picasa

Tuesday, August 24, 2010

Flip Flaps Workshop

You'll be flipping for the new Flip Flaps by Close To My Heart.
Features:
Three pocket widths to meet all your needs
Easy to adhere with the strong self-adhesive strip
Archival-quality material will safely protect your photos for years
The 12" length is designed to go with 12"x12" layouts, reaching across the page for maximum impact.
Benefits:
It's an easy way to add additional photos and journaling to your pages
Adds a fun, interactive element to your layouts
Allows you to tell more of your story in the same amount of space
You can layer Flip Flaps together for even more photos
Can be used vertically or horizontally


Come learn how to use Flip Flaps by creating simple pages.
Friday, October 1st 2010
6:30 pm to 8:00pm
$10
Reserve you seat by pre-purchasing your kit.
Pre-purchase your kit before Friday, September 24th
Visa, Master Card & Discovered accepted
Your kit comes with:
2- 12"x12" page protectors
2- 6" x 12" Flip Flaps
2- 4" x 12" Flip Flaps
1 - 8" x 12" Flip Flap
Assorted paper to create 2 simple pages


Flip Flap Workshop


Saturday, August 21, 2010

Cork Board for Victoria


My 9 year old save just about everything... I find stickers, pictures, paper drawings, notes and so many little things she likes to save, that it drives me wild to see them all spread around her desk.  So today, I went to Walmart and purchased a cork board so she can put everything she has spread on her desk onto the board.  But of course I had to decorate it a little!
Normally, I would add so many more embellishments, however, all her little pictures and keepsakes would be lost in the board if I did go "ALL" out on her board.  SOOOO, as hard as it is for me to streamline it, I will do it for my daughters sake.  Plus, she is more of a simplistic person and doesn't like over embellishing her items.  As she tells me every time I try to decorate her room...
Posted by Picasa

Sunday, August 15, 2010

Splendor Layouts

 
Hello Everyone! 
These are the pictures of the six 12 x 12 layouts we will assembling on Tuesday night and Thursday morning.
I was really happy that each set of layout has its own color theme.  I was afraid at first that all layouts would have the same color theme. 
 
Here is a list of the items you will need to bring to the workshop:
Click on the item number to purchase your own supplies!!!

 
Permanent Adhesive 1514
Glue Dots 1772
Piercing Tool Z1114
Dry Embossing Tool Z608
Precision Scissors Z534
Sanding Kit Z1294
Edge Distresser Z1297
Corner Rounder Z578
Bonding Memories Glue 1512
Tweezers Z1205
1 1/4" Circle Punch Z1311
 
This next layout has two pull out tabs, one for journaling and one for a picture
Items included in this kit:
1/2 packet of Splendor Level 2
One extra cardstock in, Moonstruck, Heavenly Blue, Topiary Green
4 White cardstock
Itty bitty sparkles
Twill Ribbon
Sunflower Waxy Flax
Orange embroidery floss
Clear buttons
Perennials: Chipboard flowers
1/2 pack of Splendor Designer Brads
Application of Liquid Applique for clouds

Thursday, August 12, 2010

Halloween Candy Holders Workshop

Hello Everyone!
This year I have decided that I will prepare for the holidays by making all my goodie bags ahead of time for my kids class mates.  And they look SO CUTE, I have decided to do a workshop for all of you as well.  
Friday, September 3rd at 6:30 PM
Don't worry if you can't make it to the workshop!!!  
You can order your kits directly from me and I will mail it to you with instructions, pre-cut paper and pre-stamped images.  All you will need is your adhesive and scissors to put them together and viola!
Pre-purchase your kits by Friday, August 27th 
Candy holders are 4" x 4.5" by 1.5" inches
Included in your kit are 20 clear bags for candy
Black Ribbon
Cardstock and Hooligans B&T to complete 20 Treat Holders
20 pre-stamped pumpkin & BOO images
20 Lagoon Circles
For just $15 that's $0.75 per holder!!!
$2.95 shipping fee... (candy not included)


Email me at scrapbooking.ink at gmail.com to pre-purchase your kits.
 PayPal 
Kits will be mailed anywhere within the United States only.
closed as of 8/27/2010


Tuesday, August 10, 2010

Witch Hat Candy Holder Workshop

Join me for a Spooktacular workshop and make these super CUTE witch hats!!!
Friday, September 3rd 2010 at 6:30 PM
Don't worry if you can't make it to the workshop or if you live outside of San Diego,
Pre-purchase your kits for ONLY $15 and I will mail your kits directly to you!!!
($2.95 shipping fee)
Witch hat candy holders are 5" tall by 5" wide.
Included in your kit are:
Pre-Cut cardstock to make 20 hats
20 Pre-stamped "Happy Halloween" & Star images
2 spools of purple ribbon. (purple,orange,green)
Assembling Instructions
All you will need is scissors, adhesive and glue dots.
Pre- purchase your kits before Friday, August 27th 2010
 Paypal
email me at scrapbooking.ink at gmail.com
Kits will be shipped anywhere in the United States only.
SERIOUSLY!!!!  THESE ARE SOME CUTE CANDY HOLDERS.
closed as of 8/27/2010


Thursday, August 5, 2010

Paper Roses Flower Pot Cards


 Here are the roses that I have been working on for tonight's card swap at Bren's meeting. Originally, I was not planning to add any other colors to the card, however, my friend Gail emailed me and just happened to mention that this month, Bren has a color theme for the cards.  YIKES!!!! 


Ces't Voila!!
Here are my flower pots with Juniper (leaves), Tulip (band around the flower pot), thank goodness I distressed with Dessert Sand and the flower pot is actually Cocoa!!!!
Posted by Picasa

Pssst... Pssst....

Have you heard the news????

Starting September 1st 2010
You will be able to order my monthly workshop kits, here on my blog!!!!
More details to come....

Tuesday, August 3, 2010

DYI: Paper Roses Tutorial

Start with three 6 petal flowers, I used the Cricut machine and the "Plantin Schoolbook" cartridge to cut out these flowers in 2 1/2".
First step is to cut out one petal from one of the flowers
.
Step two: Cut out two petals out of the second flower
.
Third step: Cut a slit on the remaining flower. From one side of a petal to the center of the flower.
Apply adhesive on the petal to the right of the cut line. be sure to spread it out over the entire flower petal as shown and lay one petal over the other.
Repeat this step for the flowers with five and four petals. Below is what you should have at this point.
With a tool such as a brush, piercing tool, pencil or any other round dimension, curl the petals of the flowers as shown below.

Curl one petal one way
And the other petal the opposite way.
Now that you have prepared all the flowers and petals, this is what you should have.
Now turn the flowers upside down and cut the bottom tips. This will allow the flower to sit flat on your projects and allow for center of flower fit better once you are assembling it.

Now you are ready to assemble. Place a small amount of adhesive on the inside of the flower and start stacking the flowers, from largest to smallest, adding adhesive time you add a flower.
If your flower ends up with a little bit of a tail, simply let it dry and prior to adding to your project snip the tail off and then add adhesive to place on your project.
Once you are done assembling your paper flowers, this is the finished product.
Ces't Voila!
A beautiful paper rose... If you are brave enough and patient enough you simply must make a bed of roses. I'm in the middle of making 36 roses for a card swap.
I will share the finished product tomorrow.

Tip  Junkie handmade projects


Monday, August 2, 2010

What a difference a stamp makes!

 
130 invitations are ready to bring a little smile to a lot of people who will be invited to celebrate the beautiful Isabella Beckwith's 15th Birthday party at her "Quinceanera".

 
Her taste is simple and delicate.  During our initial meeting together we created a design for her invitation that reflected her style and combining the colors she selected for her party. 
The flowers are "Just Blooms" from Close to My Heart, colored by several showers of Tattered Angels, Glimmer Mist in "Tutti Frutti" and "Sunkissed Peach" colors.  Believe it or not, the center of the flower is a FLORAL ARRANGEMENT PEBBLE.  :)  Long gone are the days for traditional crafting.  
I love implementing non-traditional items to my designs.  
Typically I keep a sample of the invitations I create for clients.  In this case, I wanted to add a little more flair  to create more "Wow" factor.  The stamp is by CTMH named "Adoring Corners" .  I stamped with "Versa Mark" and used Gold Embossing Powder.  Click on the name of the product used to see more details and to order directly from my website. 
 
Ces't Voila!!! 

Posted by Picasa