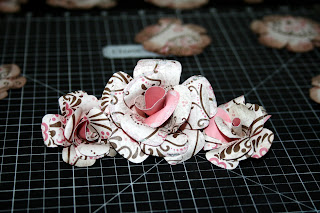
Start with three 6 petal flowers, I used the Cricut machine and the "Plantin Schoolbook" cartridge to cut out these flowers in 2 1/2".

First step is to cut out one petal from one of the flowers
.

Step two: Cut out two petals out of the second flower
.

Third step: Cut a slit on the remaining flower. From one side of a petal to the center of the flower.

Apply adhesive on the petal to the right of the cut line. be sure to spread it out over the entire flower petal as shown and lay one petal over the other.
Repeat this step for the flowers with five and four petals. Below is what you should have at this point.

With a tool such as a brush, piercing tool, pencil or any other round dimension, curl the petals of the flowers as shown below.

Curl one petal one way

And the other petal the opposite way.

Now that you have prepared all the flowers and petals, this is what you should have.
Now turn the flowers upside down and cut the bottom tips. This will allow the flower to sit flat on your projects and allow for center of flower fit better once you are assembling it.
Now you are ready to assemble. Place a small amount of adhesive on the inside of the flower and start stacking the flowers, from largest to smallest, adding adhesive time you add a flower.
If your flower ends up with a little bit of a tail, simply let it dry and prior to adding to your project snip the tail off and then add adhesive to place on your project.
Once you are done assembling your paper flowers, this is the finished product.

Ces't Voila!
A beautiful paper rose... If you are brave enough and patient enough you simply must make a bed of roses. I'm in the middle of making 36 roses for a card swap.
I will share the finished product tomorrow.


Great tutorial! Thanks for posting this information.
ReplyDeleteI'm so happy you used the Plantin schoolbook cause I have that cartridge!!! Now all I need to do is set aside some time to give this a try. I love these beautiful roses so much!
ReplyDelete